Upgrade Your Bike: Multicolor Crankset Cover Screws
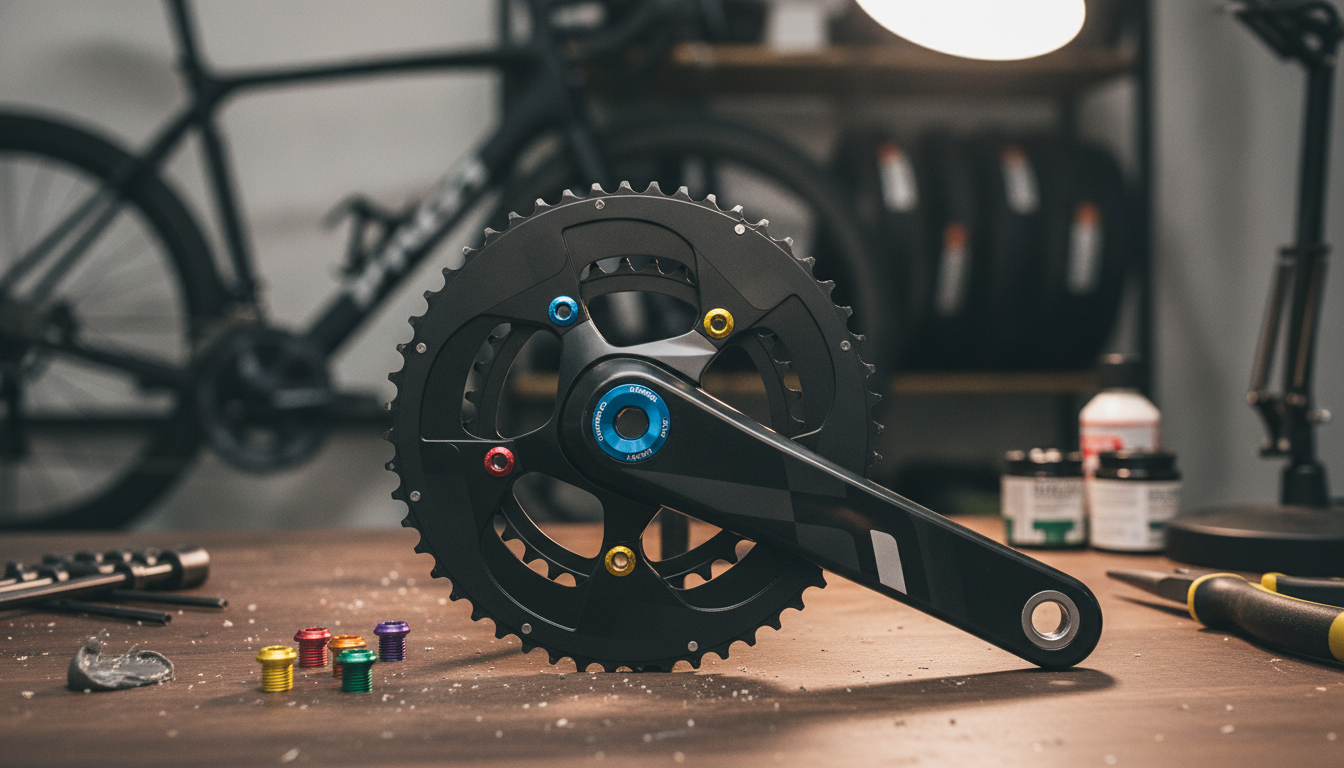
Aluminum Multicolor Crankset Cover Screws for MTB & Road Bikes
Small hardware can make a big difference in how a bike looks and how well components stay protected. Multicolor aluminum crankset cover screws add a clean, customized finish while helping secure crankset covers and keep dirt and moisture away from sensitive interfaces. This guide breaks down where these screws are used, how to confirm fit, and how to install them without stripping threads or damaging the crank. For more guidance, see Packlist – Simply Cycling.
What crankset cover screws do on a bike
- Secure decorative or protective crank/arm cover caps so they stay seated under vibration.
- Help keep grit, water, and sweat away from bolt cavities and interfaces where corrosion can start.
- Provide an easy way to refresh a worn or mismatched look after maintenance or component swaps.
- Support quick identification of left/right or bike-to-bike parts when using color coding.
Where these screws are typically used (MTB vs road)
- MTB use cases: frequent washdowns, muddy rides, and higher vibration make secure, well-seated cover hardware especially important.
- Road use cases: sweat exposure and long-duration vibration can loosen cover hardware if threads are dry or over-lubed.
- Common locations: crank arm cover caps, crankset cosmetic covers, and certain dust-cap style covers depending on crank design.
- Important distinction: cover screws are not the same as crank fixing bolts or chainring bolts; always match the part’s original role.
Fit and compatibility checks before ordering
- Match the original: confirm thread size/pitch (if threaded), screw head style, and overall length so it seats flush without bottoming out.
- Check crank brand/model: some systems use press-in caps, others use threaded caps with a small retention screw.
- Inspect the receiving threads: aluminum cranks can be damaged by cross-threading; if threads are already compromised, a new screw may not solve the issue.
- Confirm tool interface: hex/Allen, Torx, or coin-slot styles require different tools and affect ease of servicing on the road.
- Color expectations: multicolor anodized finishes can vary slightly under different lighting and between production batches.
Quick compatibility checklist
| Check | What to measure/verify | Why it matters |
|---|---|---|
| Threaded vs. press-fit cover | Does the cover itself thread in, or is there a small retention screw? | Determines whether a screw is required and what type. |
| Screw length | Measure the original screw from underside of head to tip | Too long can bottom out; too short can loosen. |
| Head style | Flat, button, countersunk, etc. | Affects flush fit and avoids rubbing on shoes/frames. |
| Tool type | Hex/Torx/slot | Prevents rounding and makes trail-side service easier. |
| Material pairing | Aluminum screw into aluminum crank | Guides torque and anti-seize choices to reduce galling. |
Material and finish: why aluminum and anodized color matter
- Weight and appearance: aluminum hardware is light and commonly anodized for vibrant, durable color.
- Corrosion behavior: anodizing helps resist oxidation, but thread contact points can still corrode if exposed to salt or sweat.
- Thread care: aluminum-on-aluminum contact can gall if installed dry; a small amount of suitable grease or anti-seize can help (use sparingly).
- Wear considerations: color can fade on high-contact edges from repeated tool use; using the correct tool size reduces cosmetic damage.
For general guidance on fastener torque and why overtightening damages threads, Park Tool’s overview is a solid reference: Park Tool — Threaded Fasteners and Torque. For crank-specific documentation and diagrams, consult your crank maker’s technical documents (for example, Shimano’s portal): Shimano — Dealer’s Manuals and Technical Documents.
Installation steps and best practices
- Clean first: remove the old screw and clean the cover and threads (a soft brush and mild degreaser are usually enough).
- Test by hand: start threading by hand for several turns to confirm alignment and avoid cross-threading.
- Use the right tool: fully seat the hex/Torx key before turning; avoid ball-end tools for final tightening.
- Apply light protection: a tiny amount of grease/anti-seize on the threads can reduce seizing; avoid excess that can attract grit.
- Tighten gently: cover screws typically require low torque; stop when seated and snug rather than forcing additional turns.
- Re-check after first ride: confirm nothing has loosened, especially after washing or riding in wet conditions.
Troubleshooting common issues
Care tips to keep the finish looking new
Product option: multicolor aluminum crankset cover screws
Aluminum Multicolor Crankset Cover Screws for MTB & Road Bikes are made for riders who want a crisp accent color while keeping crank cover hardware secure and easy to service. The best results come from confirming size/fit against the existing cover screw and using careful, low-torque technique during installation—especially with aluminum-on-aluminum threads.
At-a-glance purchase details
| Item | Details |
|---|---|
| Name | Aluminum Multicolor Crankset Cover Screws for MTB & Road Bikes |
| Price | $12.01 |
| Availability | In stock |
More in-stock picks
- Dr. Martens Women’s Black Leather Boots
- Diadora Men’s Green & White Leather Sneakers
- Guess Women’s Black Printed Ankle Boots
FAQ
Are crankset cover screws the same as crank bolts or chainring bolts?
No. Cover screws/caps are usually low-load parts meant to retain a protective or cosmetic cover, while crank fixing bolts and chainring bolts are structural fasteners that must match the exact manufacturer specification for safety and performance.
How tight should crankset cover screws be?
They should be seated and snug, not forced. If a torque spec is available for your crank/cover, follow it; otherwise tighten gently and stop as soon as the cover is secure to avoid stripping aluminum threads.
What can be done if the threads are stripped?
Stop using the damaged threads and inspect the crank/cover to confirm what’s stripped. Depending on the part, a proper thread repair insert/tap may work, but in some cases the safest fix is replacing the damaged cover or crank component rather than forcing a new screw.













Leave a comment